¶ 文件下载
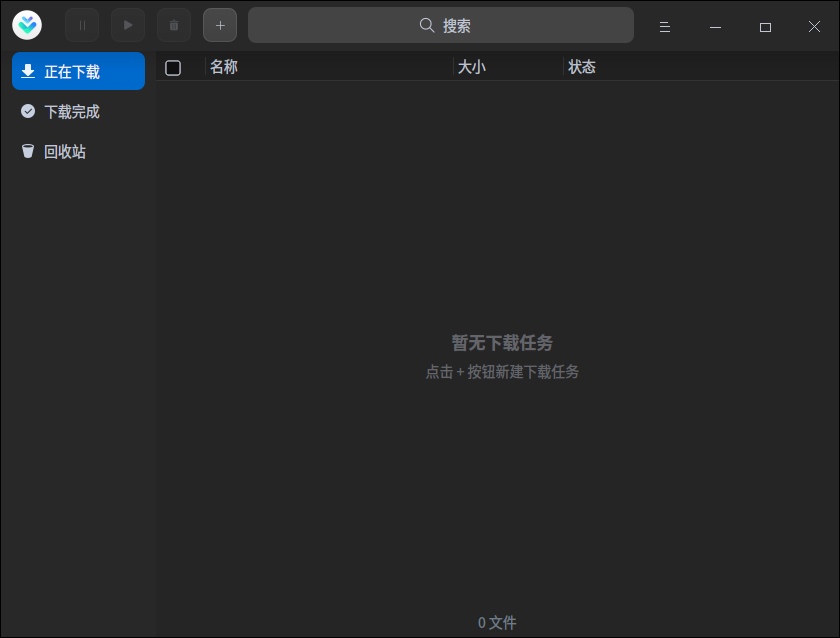
¶ GUI 界面
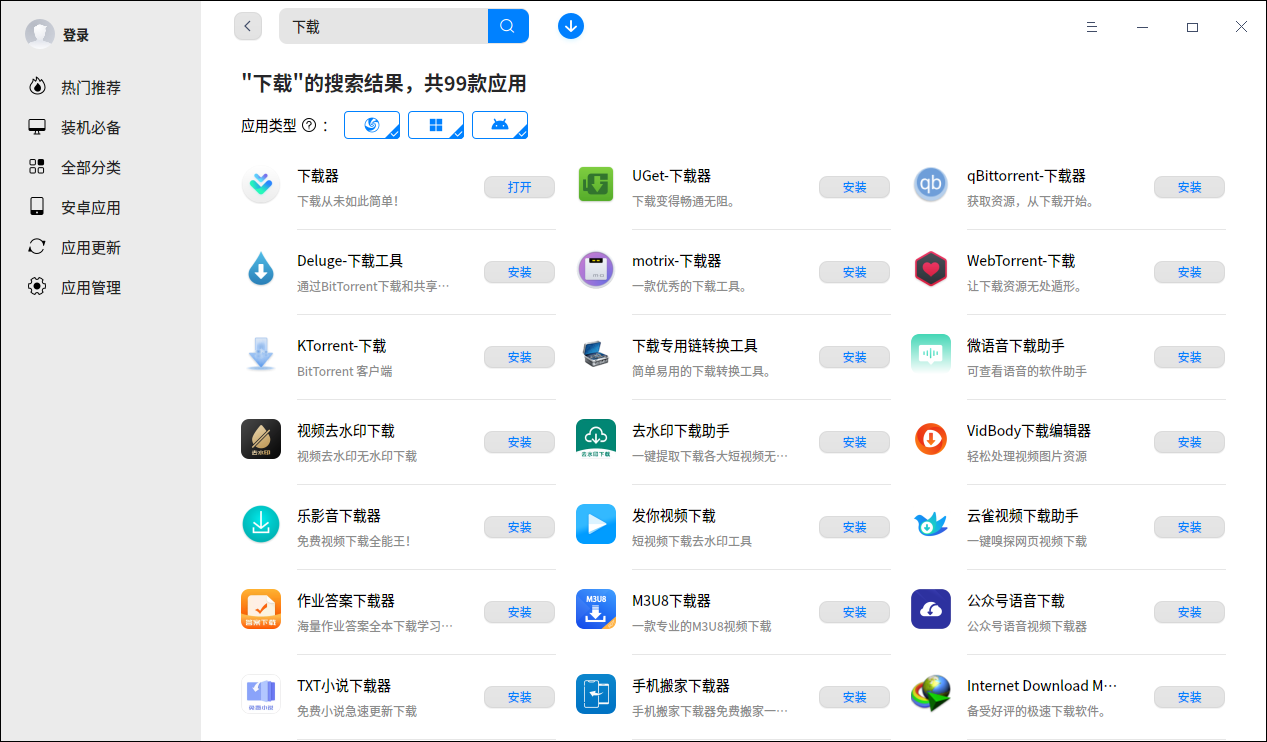
可以使用系统自带的下载器和浏览器进行文件的下载,更多下载工具可以看应用商店
¶ 终端下
¶ curl
curl 是一个命令行工具和库,用于通过 URL 传输数据。该命令支持多种不同的协议,包括HTTP、HTTPS、FTP、SCP和 SFTP。它还被设计为无需用户交互即可工作,例如在脚本中。
详细的参数介绍请看最后,或者输入curl --help查看
也可看此 ArchWiki
¶ 安装 curl
只需要输入以下命令即可安装
sudo apt install curl
¶ 简易使用方法
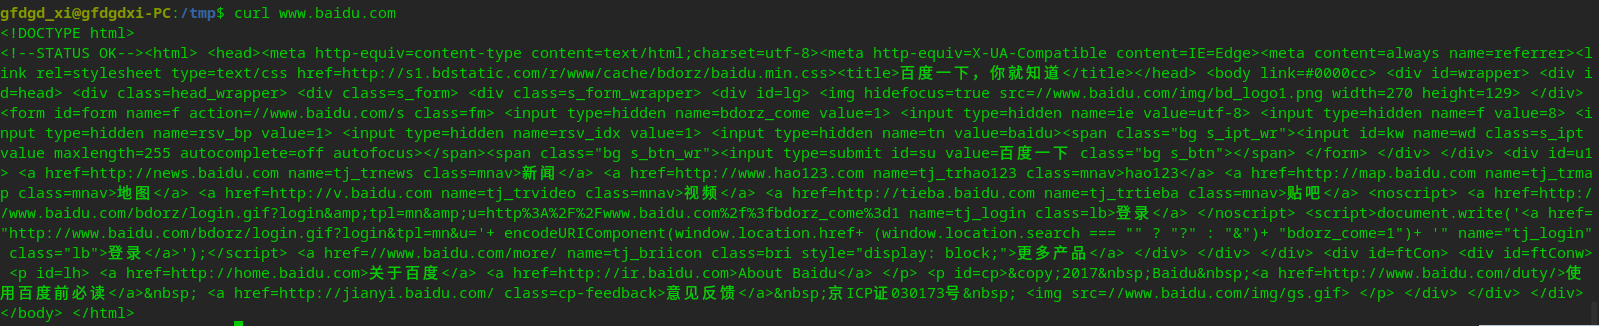
你可以使用 curl 来判断是否能连接一个网站,只需要输入如下命令就可以查看是否能连接到网站
curl 域名
然后执行后你会发现你看到了网页渲染的 HTML 源码,同理把域名换为准确的 URL 可以查看网页的源码
但如果你直接接文件的 URL,会发现无法正常下载
gfdgd_xi@gfdgdxi-PC:/tmp$ curl https://cdimage.deepin.com/releases/20.6/deepin-desktop-community-20.6-amd64.iso
Warning: Binary output can mess up your terminal. Use "--output -" to tell
Warning: curl to output it to your terminal anyway, or consider "--output
Warning: <FILE>" to save to a file.
只需要改为如下的命令即可正常下载到当前目录:
curl -O URL地址
而如果想要保存为指定文件名,可以使用如下命令:
curl -o 文件名 -O URL地址
¶ wget
GNU Wget是一个免费软件包,用于使用HTTP、HTTPS、FTP和 FTPS (自 1.18 版开始的 FTPS)检索文件。它是一个非交互式命令行工具,因此可以很容易地从脚本中调用它。
详细的参数介绍请看最后,或者输入wget --help查看
也可看此 ArchWiki
¶ 安装 wget
只需要输入以下命令即可安装
sudo apt install wget
¶ 简易使用方法
wget 的文件下载非常简单,只需要输入如下的命令即可下载到当前目录:
wget URL地址
若想要下载到指定目录,只需要输入如下命令即可
wget -P 需要下载到的文件目录 URL地址
如果想要设置为指定文件名,可以输入如下命令
wget -O 文件名 URL地址
因此,如果想要下载到指定文件指定目录,就可以输入
wget -P 目录 -O 文件名 URL地址
¶ aria2
aria2 是一个轻量级多协议多源命令行下载工具,支持 HTTP/HTTPS, FTP,BitTorrent 和 Metalink。用户可以通过内置的 JSON-RPC 和 XML-RPC 接口操作 aria2。
详细的参数介绍请看最后,或者输入aria2c --help查看
也可以看此 ArchWiki
¶ 安装 aria2
只需要输入以下命令即可安装
sudo apt install aria2
¶ 使用 aria2
aria2 的文件下载非常简单,只需要输入如下的命令即可下载到当前目录:
aria2c URL地址
可以使用-c设置断点续传,-s设置下载线程数,-d设置保存目录,-o设置保存的文件名
¶ 拓展
apt和apt-get都是非多线程下载的,所以在一些源中下载也不是很快,于是有叫做apt-fast的程序,支持多线程从源下载 deb 包,基于 aria2 制作(apt-fast 不在深度源中),同时也有星火应用商店基于apt-fast制作的ss-apt-fast
如果你添加了星火应用商店的应用源,你就可以从终端直接安装
# apt-fast
sudo apt install apt-fast
# ss-apt-fast 集成于星火应用商店的主程序包,所以需要安装了星火应用商店主程序和 apt-fast 才能使用
sudo apt install spark-store
而使用方法和apt或apt-get、aptitude是相同的,不重复介绍
详细参数也可见下
¶ curl 详细参数帮助
在终端输入curl --help即可查看
Usage: curl [options...] <url>
     --abstract-unix-socket <path> Connect via abstract Unix domain socket
     --anyauth       Pick any authentication method
 -a, --append        Append to target file when uploading
     --basic         Use HTTP Basic Authentication
     --cacert <file> CA certificate to verify peer against
     --capath <dir>  CA directory to verify peer against
 -E, --cert <certificate[:password]> Client certificate file and password
     --cert-status   Verify the status of the server certificate
     --cert-type <type> Certificate file type (DER/PEM/ENG)
     --ciphers <list of ciphers> SSL ciphers to use
     --compressed    Request compressed response
     --compressed-ssh Enable SSH compression
 -K, --config <file> Read config from a file
     --connect-timeout <seconds> Maximum time allowed for connection
     --connect-to <HOST1:PORT1:HOST2:PORT2> Connect to host
 -C, --continue-at <offset> Resumed transfer offset
 -b, --cookie <data> Send cookies from string/file
 -c, --cookie-jar <filename> Write cookies to <filename> after operation
     --create-dirs   Create necessary local directory hierarchy
     --crlf          Convert LF to CRLF in upload
     --crlfile <file> Get a CRL list in PEM format from the given file
 -d, --data <data>   HTTP POST data
     --data-ascii <data> HTTP POST ASCII data
     --data-binary <data> HTTP POST binary data
     --data-raw <data> HTTP POST data, '@' allowed
     --data-urlencode <data> HTTP POST data url encoded
     --delegation <LEVEL> GSS-API delegation permission
     --digest        Use HTTP Digest Authentication
 -q, --disable       Disable .curlrc
     --disable-eprt  Inhibit using EPRT or LPRT
     --disable-epsv  Inhibit using EPSV
     --disallow-username-in-url Disallow username in url
     --dns-interface <interface> Interface to use for DNS requests
     --dns-ipv4-addr <address> IPv4 address to use for DNS requests
     --dns-ipv6-addr <address> IPv6 address to use for DNS requests
     --dns-servers <addresses> DNS server addrs to use
     --doh-url <URL> Resolve host names over DOH
 -D, --dump-header <filename> Write the received headers to <filename>
     --egd-file <file> EGD socket path for random data
     --engine <name> Crypto engine to use
     --expect100-timeout <seconds> How long to wait for 100-continue
 -f, --fail          Fail silently (no output at all) on HTTP errors
     --fail-early    Fail on first transfer error, do not continue
     --false-start   Enable TLS False Start
 -F, --form <name=content> Specify multipart MIME data
     --form-string <name=string> Specify multipart MIME data
     --ftp-account <data> Account data string
     --ftp-alternative-to-user <command> String to replace USER [name]
     --ftp-create-dirs Create the remote dirs if not present
     --ftp-method <method> Control CWD usage
     --ftp-pasv      Use PASV/EPSV instead of PORT
 -P, --ftp-port <address> Use PORT instead of PASV
     --ftp-pret      Send PRET before PASV
     --ftp-skip-pasv-ip Skip the IP address for PASV
     --ftp-ssl-ccc   Send CCC after authenticating
     --ftp-ssl-ccc-mode <active/passive> Set CCC mode
     --ftp-ssl-control Require SSL/TLS for FTP login, clear for transfer
 -G, --get           Put the post data in the URL and use GET
 -g, --globoff       Disable URL sequences and ranges using {} and []
     --happy-eyeballs-timeout-ms <milliseconds> How long to wait in milliseconds for IPv6 before trying IPv4
     --haproxy-protocol Send HAProxy PROXY protocol v1 header
 -I, --head          Show document info only
 -H, --header <header/@file> Pass custom header(s) to server
 -h, --help          This help text
     --hostpubmd5 <md5> Acceptable MD5 hash of the host public key
     --http0.9       Allow HTTP 0.9 responses
 -0, --http1.0       Use HTTP 1.0
     --http1.1       Use HTTP 1.1
     --http2         Use HTTP 2
     --http2-prior-knowledge Use HTTP 2 without HTTP/1.1 Upgrade
     --ignore-content-length Ignore the size of the remote resource
 -i, --include       Include protocol response headers in the output
 -k, --insecure      Allow insecure server connections when using SSL
     --interface <name> Use network INTERFACE (or address)
 -4, --ipv4          Resolve names to IPv4 addresses
 -6, --ipv6          Resolve names to IPv6 addresses
 -j, --junk-session-cookies Ignore session cookies read from file
     --keepalive-time <seconds> Interval time for keepalive probes
     --key <key>     Private key file name
     --key-type <type> Private key file type (DER/PEM/ENG)
     --krb <level>   Enable Kerberos with security <level>
     --libcurl <file> Dump libcurl equivalent code of this command line
     --limit-rate <speed> Limit transfer speed to RATE
 -l, --list-only     List only mode
     --local-port <num/range> Force use of RANGE for local port numbers
 -L, --location      Follow redirects
     --location-trusted Like --location, and send auth to other hosts
     --login-options <options> Server login options
     --mail-auth <address> Originator address of the original email
     --mail-from <address> Mail from this address
     --mail-rcpt <address> Mail to this address
 -M, --manual        Display the full manual
     --max-filesize <bytes> Maximum file size to download
     --max-redirs <num> Maximum number of redirects allowed
 -m, --max-time <seconds> Maximum time allowed for the transfer
     --metalink      Process given URLs as metalink XML file
     --negotiate     Use HTTP Negotiate (SPNEGO) authentication
 -n, --netrc         Must read .netrc for user name and password
     --netrc-file <filename> Specify FILE for netrc
     --netrc-optional Use either .netrc or URL
 -:, --next          Make next URL use its separate set of options
     --no-alpn       Disable the ALPN TLS extension
 -N, --no-buffer     Disable buffering of the output stream
     --no-keepalive  Disable TCP keepalive on the connection
     --no-npn        Disable the NPN TLS extension
     --no-sessionid  Disable SSL session-ID reusing
     --noproxy <no-proxy-list> List of hosts which do not use proxy
     --ntlm          Use HTTP NTLM authentication
     --ntlm-wb       Use HTTP NTLM authentication with winbind
     --oauth2-bearer <token> OAuth 2 Bearer Token
 -o, --output <file> Write to file instead of stdout
     --pass <phrase> Pass phrase for the private key
     --path-as-is    Do not squash .. sequences in URL path
     --pinnedpubkey <hashes> FILE/HASHES Public key to verify peer against
     --post301       Do not switch to GET after following a 301
     --post302       Do not switch to GET after following a 302
     --post303       Do not switch to GET after following a 303
     --preproxy [protocol://]host[:port] Use this proxy first
 -#, --progress-bar  Display transfer progress as a bar
     --proto <protocols> Enable/disable PROTOCOLS
     --proto-default <protocol> Use PROTOCOL for any URL missing a scheme
     --proto-redir <protocols> Enable/disable PROTOCOLS on redirect
 -x, --proxy [protocol://]host[:port] Use this proxy
     --proxy-anyauth Pick any proxy authentication method
     --proxy-basic   Use Basic authentication on the proxy
     --proxy-cacert <file> CA certificate to verify peer against for proxy
     --proxy-capath <dir> CA directory to verify peer against for proxy
     --proxy-cert <cert[:passwd]> Set client certificate for proxy
     --proxy-cert-type <type> Client certificate type for HTTPS proxy
     --proxy-ciphers <list> SSL ciphers to use for proxy
     --proxy-crlfile <file> Set a CRL list for proxy
     --proxy-digest  Use Digest authentication on the proxy
     --proxy-header <header/@file> Pass custom header(s) to proxy
     --proxy-insecure Do HTTPS proxy connections without verifying the proxy
     --proxy-key <key> Private key for HTTPS proxy
     --proxy-key-type <type> Private key file type for proxy
     --proxy-negotiate Use HTTP Negotiate (SPNEGO) authentication on the proxy
     --proxy-ntlm    Use NTLM authentication on the proxy
     --proxy-pass <phrase> Pass phrase for the private key for HTTPS proxy
     --proxy-pinnedpubkey <hashes> FILE/HASHES public key to verify proxy with
     --proxy-service-name <name> SPNEGO proxy service name
     --proxy-ssl-allow-beast Allow security flaw for interop for HTTPS proxy
     --proxy-tls13-ciphers <ciphersuite list> TLS 1.3 proxy cipher suites
     --proxy-tlsauthtype <type> TLS authentication type for HTTPS proxy
     --proxy-tlspassword <string> TLS password for HTTPS proxy
     --proxy-tlsuser <name> TLS username for HTTPS proxy
     --proxy-tlsv1   Use TLSv1 for HTTPS proxy
 -U, --proxy-user <user:password> Proxy user and password
     --proxy1.0 <host[:port]> Use HTTP/1.0 proxy on given port
 -p, --proxytunnel   Operate through an HTTP proxy tunnel (using CONNECT)
     --pubkey <key>  SSH Public key file name
 -Q, --quote         Send command(s) to server before transfer
     --random-file <file> File for reading random data from
 -r, --range <range> Retrieve only the bytes within RANGE
     --raw           Do HTTP "raw"; no transfer decoding
 -e, --referer <URL> Referrer URL
 -J, --remote-header-name Use the header-provided filename
 -O, --remote-name   Write output to a file named as the remote file
     --remote-name-all Use the remote file name for all URLs
 -R, --remote-time   Set the remote file's time on the local output
 -X, --request <command> Specify request command to use
     --request-target Specify the target for this request
     --resolve <host:port:address[,address]...> Resolve the host+port to this address
     --retry <num>   Retry request if transient problems occur
     --retry-connrefused Retry on connection refused (use with --retry)
     --retry-delay <seconds> Wait time between retries
     --retry-max-time <seconds> Retry only within this period
     --sasl-ir       Enable initial response in SASL authentication
     --service-name <name> SPNEGO service name
 -S, --show-error    Show error even when -s is used
 -s, --silent        Silent mode
     --socks4 <host[:port]> SOCKS4 proxy on given host + port
     --socks4a <host[:port]> SOCKS4a proxy on given host + port
     --socks5 <host[:port]> SOCKS5 proxy on given host + port
     --socks5-basic  Enable username/password auth for SOCKS5 proxies
     --socks5-gssapi Enable GSS-API auth for SOCKS5 proxies
     --socks5-gssapi-nec Compatibility with NEC SOCKS5 server
     --socks5-gssapi-service <name> SOCKS5 proxy service name for GSS-API
     --socks5-hostname <host[:port]> SOCKS5 proxy, pass host name to proxy
 -Y, --speed-limit <speed> Stop transfers slower than this
 -y, --speed-time <seconds> Trigger 'speed-limit' abort after this time
     --ssl           Try SSL/TLS
     --ssl-allow-beast Allow security flaw to improve interop
     --ssl-no-revoke Disable cert revocation checks (Schannel)
     --ssl-reqd      Require SSL/TLS
 -2, --sslv2         Use SSLv2
 -3, --sslv3         Use SSLv3
     --stderr        Where to redirect stderr
     --styled-output Enable styled output for HTTP headers
     --suppress-connect-headers Suppress proxy CONNECT response headers
     --tcp-fastopen  Use TCP Fast Open
     --tcp-nodelay   Use the TCP_NODELAY option
 -t, --telnet-option <opt=val> Set telnet option
     --tftp-blksize <value> Set TFTP BLKSIZE option
     --tftp-no-options Do not send any TFTP options
 -z, --time-cond <time> Transfer based on a time condition
     --tls-max <VERSION> Set maximum allowed TLS version
     --tls13-ciphers <list of TLS 1.3 ciphersuites> TLS 1.3 cipher suites to use
     --tlsauthtype <type> TLS authentication type
     --tlspassword   TLS password
     --tlsuser <name> TLS user name
 -1, --tlsv1         Use TLSv1.0 or greater
     --tlsv1.0       Use TLSv1.0 or greater
     --tlsv1.1       Use TLSv1.1 or greater
     --tlsv1.2       Use TLSv1.2 or greater
     --tlsv1.3       Use TLSv1.3 or greater
     --gmtlsv1.1     Use GMTLSv1.1 or greater
     --tr-encoding   Request compressed transfer encoding
     --trace <file>  Write a debug trace to FILE
     --trace-ascii <file> Like --trace, but without hex output
     --trace-time    Add time stamps to trace/verbose output
     --unix-socket <path> Connect through this Unix domain socket
 -T, --upload-file <file> Transfer local FILE to destination
     --url <url>     URL to work with
 -B, --use-ascii     Use ASCII/text transfer
 -u, --user <user:password> Server user and password
 -A, --user-agent <name> Send User-Agent <name> to server
 -v, --verbose       Make the operation more talkative
 -V, --version       Show version number and quit
 -w, --write-out <format> Use output FORMAT after completion
     --xattr         Store metadata in extended file attributes
¶ wget 详细参数帮助
在终端输入wget --help即可查看
GNU Wget 1.20.1,非交互式的网络文件下载工具。
用法: wget [选项]... [URL]...

长选项所必须的参数在使用短选项时也是必须的。

启动:
  -V,  --version                   显示 Wget 的版本信息并退出
  -h,  --help                      打印此帮助
  -b,  --background                启动后转入后台
  -e,  --execute=命令              运行一个“.wgetrc”风格的命令

日志和输入文件:
  -o,  --output-file=文件          将日志信息写入 FILE
  -a,  --append-output=文件        将信息添加至 FILE
  -d,  --debug                     打印大量调试信息
  -q,  --quiet                     安静模式 (无信息输出)
  -v,  --verbose                   详尽的输出 (此为默认值)
  -nv, --no-verbose                关闭详尽输出,但不进入安静模式
       --report-speed=类型         以 <类型> 报告带宽。类型可以是 bits
  -i,  --input-file=文件           下载本地或外部 <文件> 中的 URL
  -F,  --force-html                把输入文件当成 HTML 文件
  -B,  --base=URL                  解析相对于 URL 的 HTML 输入文件链接 (-i -F)
       --config=文件               指定要使用的配置文件
       --no-cookies                不读取任何配置文件
       --rejected-log=文件         将拒绝 URL 的原因写入 <文件>。

下载:
  -t,  --tries=数字                设置重试次数为 <数字> (0 代表无限制)
       --retry-connrefused         即使拒绝连接也是重试
       --retry-on-http-error=ERRORS    提供以逗号分隔的列表,列出遇到时进行重试的 HTTP 错误
  -O,  --output-document=文件      将文档写入 FILE
  -nc, --no-clobber                不要下载已存在将被覆盖的文件
       --no-netrc                  不要尝试从 .netrc 获取凭据
  -c,  --continue                  断点续传下载文件
       --start-pos=偏移量          从由零计数的 <偏移量> 开始下载
       --progress=类型             选择进度条类型
       --show-progress             在任意啰嗦状态下都显示进度条
  -N,  --timestamping              只获取比本地文件新的文件
       --no-if-modified-since      不要在时间戳 (timestamping) 模式下使用
                                     if-modified-since get 条件请求
       --no-use-server-timestamps  不用服务器上的时间戳来设置本地文件
  -S,  --server-response           打印服务器响应
       --spider                    不下载任何文件
  -T,  --timeout=SECONDS           将所有超时设为 SECONDS 秒
       --dns-timeout=SECS          设置 DNS 查寻超时为 SECS 秒
       --connect-timeout=SECS      设置连接超时为 SECS 秒
       --read-timeout=SECS         设置读取超时为 SECS 秒
  -w,  --wait=SECONDS              等待间隔为 SECONDS 秒
       --waitretry=SECONDS         在获取文件的重试期间等待 1..SECONDS 秒
       --random-wait               获取多个文件时,每次随机等待间隔 (0.5~1.5)*WAIT 秒
       --no-proxy                  禁止使用代理
  -Q,  --quota=数字                设置获取配额为 <数字> 字节
       --bind-address=ADDRESS      绑定至本地主机上的 ADDRESS (主机名或是 IP)
       --limit-rate=RATE           限制下载速率为 RATE
       --no-dns-cache              关闭 DNS 查询缓存
       --restrict-file-names=系统  限定文件名中的字符为 <系统> 允许的字符
       --ignore-case               匹配文件/目录时忽略大小写
  -4,  --inet4-only                仅连接至 IPv4 地址
  -6,  --inet6-only                仅连接至 IPv6 地址
       --prefer-family=地址族      首先连接至指定家族(IPv6,IPv4 或 none)的地址
       --user=用户                 将 ftp 和 http 的用户名均设置为 <用户>
       --password=密码             将 ftp 和 http 的密码均设置为 <密码>
       --ask-password              提示输入密码
       --use-askpass=命令          指定用于请求用户名和密码的凭据管理器。
                                     如果没有提供指定命令,程序将使用 WGET_ASKPASS 或
                                     SSH_ASKPASS 环境变量。
       --no-iri                    关闭 IRI 支持
       --local-encoding=ENC        使用 ENC 作为 IRI (国际化资源标识符) 的本地编码
       --remote-encoding=ENC       使用 ENC 作为默认远程编码
       --unlink                    覆盖前移除文件
       --xattr                     turn on storage of metadata in extended file attributes

目录:
  -nd, --no-directories            不创建目录
  -x,  --force-directories         强制创建目录
  -nH, --no-host-directories       不要创建主 (host) 目录
       --protocol-directories      在目录中使用协议名称
  -P,  --directory-prefix=前缀     保存文件到 <前缀>/..
       --cut-dirs=数字             忽略远程目录中 <数字> 个目录层。

HTTP 选项:
       --http-user=用户            设置 http 用户名为 <用户>
       --http-password=密码        设置 http 密码为 <密码>
       --no-cache                  不使用服务器缓存的数据。
       --default-page=NAME         改变默认页 (通常是“index.html”)。
  -E,  --adjust-extension          以合适的扩展名保存 HTML/CSS 文档
       --ignore-length             忽略头部的‘Content-Length’区域
       --header=字符串             在头部插入 <字符串>
       --compression=类型          选择压缩类型,值可以为 auto、gzip 和 none。(默认:none)
       --max-redirect              每页所允许的最大重定向
       --proxy-user=用户           使用 <用户> 作为代理用户名
       --proxy-password=密码       使用 <密码> 作为代理密码
       --referer=URL               在 HTTP 请求头包含‘Referer: URL’
       --save-headers              将 HTTP 头保存至文件。
  -U,  --user-agent=代理           标识自己为 <代理> 而不是 Wget/VERSION。
       --no-http-keep-alive        禁用 HTTP keep-alive (持久连接)。
       --no-cookies                不使用 cookies。
       --load-cookies=文件         会话开始前从 <文件> 中载入 cookies。
       --save-cookies=文件         会话结束后保存 cookies 至 FILE。
       --keep-session-cookies      载入并保存会话 (非永久) cookies。
       --post-data=字符串          使用 POST 方式;把 <字串>作为数据发送。
       --post-file=文件            使用 POST 方式;发送 <文件> 内容。
       --method=HTTP方法           在请求中使用指定的 <HTTP 方法>。
       --post-data=字符串          把 <字串> 作为数据发送,必须设置 --method
       --post-file=文件            发送 <文件> 内容,必须设置 --method
       --content-disposition       当选择本地文件名时允许 Content-Disposition
                                   头部 (实验中)。
       --content-on-error          在服务器错误时输出接收到的内容
       --auth-no-challenge         不先等待服务器询问就发送基本 HTTP 验证信息。

HTTPS (SSL/TLS) 选项:
       --secure-protocol=PR         选择安全协议,值可以是 auto、SSLv2、
                                    SSLv3、TLSv1、TLSv1_1、TLSv1_2 或 PFS
       --https-only                 只跟随安全的 HTTPS 链接
       --no-check-certificate       不要验证服务器的证书。
       --certificate=文件           客户端证书文件。
       --certificate-type=类型      客户端证书类型,PEM 或 DER。
       --private-key=文件           私钥文件。
       --private-key-type=类型      私钥文件类型,PEM 或 DER。
       --ca-certificate=文件        带有一组 CA 证书的文件。
       --ca-directory=DIR           保存 CA 证书的哈希列表的目录。
       --ca-certificate=文件        带有一组 CA 证书的文件。
       --pinnedpubkey=文件/散列值  用于验证节点的公钥(PEM/DER)文件或
                                   任何数量的 sha256 散列值,以 base64 编码、
                                   “sha256//” 开头、用“;”间隔

       --ciphers=STR           Set the priority string (GnuTLS) or cipher list string (OpenSSL) directly.
                                   Use with care. This option overrides --secure-protocol.
                                   The format and syntax of this string depend on the specific SSL/TLS engine.
HSTS 选项:
       --no-hsts                   禁用 HSTS
       --hsts-file                 HSTS 数据库路径(将覆盖默认值)

FTP 选项:
       --ftp-user=用户             设置 ftp 用户名为 <用户>。
       --ftp-password=密码         设置 ftp 密码为 <密码>
       --no-remove-listing         不要删除‘.listing’文件
       --no-glob                   不在 FTP 文件名中使用通配符展开
       --no-passive-ftp            禁用“passive”传输模式
       --preserve-permissions      保留远程文件的权限
       --retr-symlinks             递归目录时,获取链接的文件 (而非目录)

FTPS 选项:
       --ftps-implicit                 使用隐式 FTPS(默认端口 990)
       --ftps-resume-ssl               打开数据连接时继续控制连接中的 SSL/TLS 会话
       --ftps-clear-data-connection    只加密控制信道;数据传输使用明文
       --ftps-fallback-to-ftp          回落到 FTP,如果目标服务器不支持 FTPS
WARC 选项:
       --warc-file=文件名          在一个 .warc.gz 文件里保持请求/响应数据
       --warc-header=字符串        在头部插入 <字符串>
       --warc-max-size=数字        将 WARC 的最大尺寸设置为 <数字>
       --warc-cdx                  写入 CDX 索引文件
       --warc-dedup=文件名         不要记录列在此 CDX 文件内的记录
       --no-warc-compression       不要 GZIP 压缩 WARC 文件
       --no-warc-digests           不要计算 SHA1 摘要
       --no-warc-keep-log          不要在 WARC 记录中存储日志文件
       --warc-tempdir=目录         WARC 写入器的临时文件目录

递归下载:
  -r,  --recursive                 指定递归下载
  -l,  --level=数字                最大递归深度 (inf 或 0 代表无限制,即全部下载)。
       --delete-after              下载完成后删除本地文件
  -k,  --convert-links             让下载得到的 HTML 或 CSS 中的链接指向本地文件
       --convert-file-only         只转换 URL 的文件部分(一般叫做“基础名”/basename)
       --backups=N                 写入文件 X 前,轮换移动最多 N 个备份文件
  -K,  --backup-converted          在转换文件 X 前先将它备份为 X.orig。
  -m,  --mirror                    -N -r -l inf --no-remove-listing 的缩写形式。
  -p,  --page-requisites           下载所有用于显示 HTML 页面的图片之类的元素。
       --strict-comments           用严格方式 (SGML) 处理 HTML 注释。

递归接受/拒绝:
  -A,  --accept=列表               逗号分隔的可接受的扩展名列表
  -R,  --reject=列表               逗号分隔的要拒绝的扩展名列表
       --accept-regex=REGEX        匹配接受的 URL 的正则表达式
       --reject-regex=REGEX        匹配拒绝的 URL 的正则表达式
       --regex-type=类型           正则类型 (posix|pcre)
  -D,  --domains=列表              逗号分隔的可接受的域名列表
       --exclude-domains=列表      逗号分隔的要拒绝的域名列表
       --follow-ftp                跟踪 HTML 文档中的 FTP 链接
       --follow-tags=列表          逗号分隔的跟踪的 HTML 标识列表
       --ignore-tags=列表          逗号分隔的忽略的 HTML 标识列表
  -H,  --span-hosts                递归时转向外部主机
  -L,  --relative                  仅跟踪相对链接
  -I,  --include-directories=列表  允许目录的列表
       --trust-server-names        使用重定向 URL 的最后一段作为本地文件名
  -X,  --exclude-directories=列表  排除目录的列表
  -np, --no-parent                 不追溯至父目录

请将错误报告、问题和讨论寄信至 <[email protected]>
和/或在 https://savannah.gnu.org/bugs/?func=additem&group=wget 开 issue 进行讨论。
¶ aria2 详细参数帮助
用法:aria2c [OPTIONS] [URI | MAGNET | TORRENTFILEILE | METALINK_FILE]...
正列出附有标签“#basic”的选项。
参见“aria2c -h#help”以获知所有可用标签。
选项:
 -v, --version                打印版本号并退出。

                              标签: #basic

 -h, --help[=#标签|关键字]    显示用法并退出。
                              帮助信息按照以“#”开头的标签分类。
                              例如,输入“--help=#http”会得到带“#http”
                              标签的各选项的用法。
                              如果指定了非标签的词,那么打印名字含这个词
                              的各选项的用法。

                              可能的取值: #basic, #advanced, #http, #https, #ftp, #metalink, #bittorrent, #cookie, #hook, #file, #rpc, #checksum, #experimental, #deprecated, #help, #all
                              默认: #basic
                              标签: #basic, #help

 -l, --log=日志               日志文件名称。如果指定“-”,
                              日志将被写到标准输出。

                              可能的取值: /path/to/file, -
                              标签: #basic

 -d, --dir=目录               用于存储已下载文件的目录。

                              可能的取值: /path/to/directory
                              默认: /tmp
                              标签: #basic, #file

 -o, --out=FILE   文件保存名字。此文件将以此名字永久保存在 -d
                              参数所指定的相对路径下。当 -Z 参数被启用时,
                              此选项报废。

                              可能的取值: /path/to/file
                              标签: #basic, #http, #ftp, #file

 -s, --split=N                使用 N 个连接下载文件。如 N 小于需要下载的 URI 数量,
                              那么将使用所有连接,剩余的 URL 将作为候补。
                              如 N 大于需要下载的 URI 数量,多余的 URL 将用于并行下载。
                              到主机的连接数量受 --max-connection-per-server 选项限制。
                              参见 --min-split-size 选项。

                              可能的取值: 1-*
                              默认: 5
                              标签: #basic, #http, #ftp

 --file-allocation=方式       指定文件分配方式。
                              “none”选项表示不预分配空间。
                              “prealloc”选项表示在下载开始前预先分配空间。
                              根据文件的大小,这可能会花费一些时间。
                              如果您正在使用新型文件系统如 ext4(启用扩展属性支持),
                              btrfs,xfs 或 NTFS(仅限 MinGW 环境构建),
                              “falloc”是您最好的选择。
                              它几乎能在一瞬间完成很大(几个 GiB)文件的预分配。
                              但注意在比较旧的文件系统如 ext3 和 FAT32 上不要使用“falloc”
                              因为在这些文件系统上该选项花费的时间和“prealloc”
                              不相上下,并且在分配完成前 aria2 进程会被完全阻塞。
                              如果您的系统中 posix_fallocate() 函数不可用,
                              “falloc”选项将不适用。
                              “trunc”将调用 ftruncate() 系统指令或平台的相应功能
                              来裁剪获得指定大小的文件。

                              可能的取值: none, prealloc, trunc, falloc
                              默认: prealloc
                              标签: #basic, #file

 -V, --check-integrity[=true|false]  通过校验文件块或整文件哈希检查文件的完整性。
                              该选项仅对 BitTorrent、带校验和的 Metalink 和(启用
                              --checksum 选项时)HTTP(S)/FTP 下载有效。
                              如提供的是文件块的校验和,在下载时就可自动校验并重试
                              损坏的部分;换成整文件,就必须等到下载完成才能校验。
                              (哪种校验值可用?)这取决于文件长度。
                              如果校验失败,文件将被重新下载。如果同时提供了按块的
                              校验值和全文件校验值,那么只会使用块哈希。

                              可能的取值: true, false
                              默认: false
                              标签: #basic, #metalink, #bittorrent, #file, #checksum

 -c, --continue[=true|false] 继续下载一个仅部分完成的文件。
                              使用这个选项来继续下载一个由浏览器或其他程序从开头单线程下载的文件。
                              目前这个选项仅能用于 http(s)/ftp 下载。

                              可能的取值: true, false
                              默认: false
                              标签: #basic, #http, #ftp

 -i, --input-file=文件        下载 <文件> 中列出的地址。
                              可以一次使用多个地址,在同一行里使用制表符分隔多个地址。使用“-”时从标准输入读取。
                              另外,在每一行地址后可以指定选项。包含选项的行必须以至少一个空格开始,并且每行一个选项。
                              在 man 手册中查看 INPUT FILE 章节。另见 --deferred-input 选项。

                              可能的取值: /path/to/file, -
                              标签: #basic

 -j, --max-concurrent-downloads=N 设置每个静态(HTTP/FTP)URL、种子和 metalink 的最大并行
                              下载速度。
                              参见 --split 和 --optimize-concurrent-downloads 选项。

                              可能的取值: 1-*
                              默认: 5
                              标签: #basic

 -Z, --force-sequential[=true|false] 从命令行顺序获取链接,
                                     并以单独的会话下载每个链接,
                                     如同其他常见的命令行下载工具。

                              可能的取值: true, false
                              默认: false
                              标签: #basic

 -x, --max-connection-per-server=N   每个下载中对单个服务器的最大连接数。

                              可能的取值: 1-16
                              默认: 1
                              标签: #basic, #http, #ftp

 -k, --min-split-size=SIZE aria2 不分割小于 2 * SIZE 字节范围的文件。例如,让我们考虑下载 20MiB 的文件,如果 SIZE 为10M,aria2 可以将文件拆分为2个[0-10MiB]和[10MiB-20MiB]的文件,并使用 2 个源(如果 --split>=2)下载它。如果 SIZE 为 15M,由于 2 * 15M>20MiB,aria2 不会拆分文件并使用 1 个源下载。你可以追加 K 或 M(1K = 1024,1M = 1024K)。

                              可能的取值: 1048576-1073741824
                              默认: 20M
                              标签: #basic, #http, #ftp

 --ftp-user=用户              设置 FTP 用户。此设置对所有 URL 有效。

                              标签: #basic, #ftp

 --ftp-passwd=密码            设置 FTP 密码。此设置对所有 URL 有效。

                              标签: #basic, #ftp

 --http-user=用户             设置 HTTP 用户。此设置对所有 URL 有效。

                              标签: #basic, #http

 --http-passwd=密码           设置 HTTP 密码。此设置对所有 URL 有效。

                              标签: #basic, #http

 --load-cookies=文件          从文件载入 Cookies,使用 Firefox3
                              及 Mozilla/Firefox(1.x/2.x)/Netscape 格式。

                              可能的取值: /path/to/file
                              标签: #basic, #http, #cookie

 -S, --show-files[=true|false]  打印 .torrent,.meta4 和 .metalink 这类
                         文件内含的文件列表,然后退出。
                         如果是 torrent 文件,会给出更详细信息。

                              可能的取值: true, false
                              默认: false
                              标签: #basic, #metalink, #bittorrent

 --max-overall-upload-limit=SPEED 设置全局最大上传速度为 SPEED bytes/sec.
                              0 意味着不限制。使用 K 或 M (1K = 1024, 1M = 1024K) 也是可
                             以的。您也可以使用 --max-upload-limit 可以为单个 torrent 文件限速。

                              可能的取值: 0-*
                              默认: 0
                              标签: #basic, #bittorrent

 -u, --max-upload-limit=速度  设置每个 torrent 的最大上传速度 (Bytes/s)。
                              0 意味着不限制。
                              可附加 K 或 M(1K=1024,1M=1024K)。
                              要限制总体上传速度,请使用 --max-overall-upload-limit 选项。

                              可能的取值: 0-*
                              默认: 0
                              标签: #basic, #bittorrent

 -T, --torrent-file=种子文件      指定 .torrent 文件的路径。

                              可能的取值: /path/to/file
                              标签: #basic, #bittorrent

 --listen-port=端口...        设置 BitTorrent 下载使用的 TCP 端口。
                              使用“,”可以指定多个端口,例如:
                              “6881,6885”。您也可以使用“-”指定一个范围:
                              “6881-6999”。“,”和“-”可以一起使用。

                              可能的取值: 1024-65535
                              默认: 6881-6999
                              标签: #basic, #bittorrent

 --enable-dht[=true|false]    启用 IPv4 DHT 功能。
                              同时也启用 UDP Tracker 服务器支持。
                              如果种子中设置了“私有 (private)”旗标,无论此项真假,
                              aria2 都不会使用 DHT。

                              可能的取值: true, false
                              默认: true
                              标签: #basic, #bittorrent

 --dht-listen-port=端口...    设置 DHT(IPv4, v6) 和 UDP Tracker 的 UDP 监听端口。
                              可以使用 "," 指定多个端口(如:"6881,6885"),也可用
                              "-" 指定范围(如:"6881-6999")。"," 和 "-" 可共用。

                              可能的取值: 1024-65535
                              默认: 6881-6999
                              标签: #basic, #bittorrent

 --enable-dht6[=true|false]   启用 IPv6 DHT 功能。
                              使用 --dht-listen-port 选项指定要监听的端口。
                              参见 --dht-listen-addr6 选项。

                              可能的取值: true, false
                              默认: false
                              标签: #basic, #bittorrent

 --dht-listen-addr6=ADDR 指定要绑定的IPv6 DHT套接字地址。
                             它应该是一个全球单播IPv6地址的主机。

                              标签: #basic, #bittorrent

 -M, --metalink-file=METALINK_文件 .meta4 和 .metalink 的路径。
                              如果指定了“-”,从标准输入读取。

                              可能的取值: /path/to/file, -
                              标签: #basic, #metalink

URI, MAGNET, TORRENT_FILE, METALINK_FILE:
 您可以指定多个 HTTP(S)/FTP URI。除非您设置了 -Z 选项,所有 URI 必须指向
 同一文件,否则下载会失败。
 您也可以指定任意数量的 BitTorrent Magnet URI 或储存在本地的 torrent/
 metalink 文件。请注意,它们总是作为单独的下载处理。

 You can specify both torrent file with -T option and URIs. By doing this,
 download a file from both torrent swarm and HTTP/FTP server at the same time,
 while the data from HTTP/FTP are uploaded to the torrent swarm. For single file
 torrents, URI can be a complete URI pointing to the resource or if URI ends
 with '/', 'name' in torrent file is added. For multi-file torrents, 'name' and
 'path' in torrent are added to form a URI for each file.

 Make sure that URI is quoted with single(') or double(") quotation if it
 contains "&" or any characters that have special meaning in shell.

About the number of connections
 Since 1.10.0 release, aria2 uses 1 connection per host by default and has 20MiB
 segment size restriction. So whatever value you specify using -s option, it
 uses 1 connection per host. To make it behave like 1.9.x, use
 --max-connection-per-server=4 --min-split-size=1M.

参见 man 手册页面以获取更多信息。
¶ apt 使用参数介绍
可以在终端输入apt --help查看
apt 1.8.2.3 (amd64)
用法: apt [选项] 命令

命令行软件包管理器 apt 提供软件包搜索,管理和信息查询等功能。
它提供的功能与其他 APT 工具相同(像 apt-get 和 apt-cache),
但是默认情况下被设置得更适合交互。

常用命令:
  list - 根据名称列出软件包
  search - 搜索软件包描述
  show - 显示软件包细节
  install - 安装软件包
  reinstall - reinstall packages
  remove - 移除软件包
  autoremove - 卸载所有自动安装且不再使用的软件包
  update - 更新可用软件包列表
  upgrade - 通过 安装/升级 软件来更新系统
  full-upgrade - 通过 卸载/安装/升级 来更新系统
  edit-sources - 编辑软件源信息文件

参见 apt(8) 以获取更多关于可用命令的信息。
程序配置选项及语法都已经在 apt.conf(5) 中阐明。
欲知如何配置软件源,请参阅 sources.list(5)。
软件包及其版本偏好可以通过 apt_preferences(5) 来设置。
关于安全方面的细节可以参考 apt-secure(8).
                                         本 APT 具有超级牛力。
¶ apt-get 使用参数介绍
在终端输入apt-get --help即可查看
apt 1.8.2.3 (amd64)
用法: apt-get [选项] 命令
    apt-get [选项] install|remove 软件包1 [软件包2 ...]
    apt-get [选项] source 软件包1 [软件包2 ...]

apt-get 可以从认证软件源下载软件包及相关信息,以便安装和升级软件包,
或者用于移除软件包。在这些过程中,软件包依赖会被妥善处理。

常用命令:
  update - 取回更新的软件包列表信息
  upgrade - 进行一次升级
  install - 安装新的软件包(注:软件包名称是 libc6 而非 libc6.deb)
  reinstall - Reinstall packages (pkg is libc6 not libc6.deb)
  remove - 卸载软件包
  purge - 卸载并清除软件包的配置
  autoremove - 卸载所有自动安装且不再使用的软件包
  dist-upgrade - 发行版升级,见 apt-get(8)
  dselect-upgrade - 根据 dselect 的选择来进行升级
  build-dep - 为源码包配置所需的编译依赖关系
  clean - 删除所有已下载的包文件
  autoclean - 删除已下载的旧包文件
  check - 核对以确认系统的依赖关系的完整性
  source - 下载源码包文件
  download - 下载指定的二进制包到当前目录
  changelog - 下载指定软件包,并显示其变更日志(changelog)

参见 apt-get(8) 以获取更多关于可用命令的信息。
程序配置选项及语法都已经在 apt.conf(5) 中阐明。
欲知如何配置软件源,请参阅 sources.list(5)。
软件包及其版本偏好可以通过 apt_preferences(5) 来设置。
关于安全方面的细节可以参考 apt-secure(8).
                                         本 APT 具有超级牛力。
¶ aptitude 使用参数介绍
在终端输入aptitude --help即可查看
aptitude 0.8.11
用法: aptitude [-S 文件名] [-u|-i]
       aptitude [选项] <动作> ...

Actions (if none is specified, aptitude will enter interactive mode):

 install         安装/升级软件包。
 remove          卸载软件包。
 purge           卸载软件包及其配置文件。
 hold            将软件包置于保持状态。
 unhold          取消对一个软件包的保持命令。
 markauto        将软件包标记为已经自动安装。
 unmarkauto      将软件包标记为已经手动安装。
 forbid-version  禁止 aptitude 升级到某一特定版本的软件包。
 update          下载新/可升级软件包列表。
 safe-upgrade    执行一次安全的升级。
 full-upgrade    执行升级,可能会安装和卸载软件包。
 build-dep       安装软件包的构建依赖。
 forget-new      忘记哪些软件包是“新”的。
 search          按名称和/或表达式搜索软件包。
 show            显示一个软件包的详细信息。
 showsrc         显示源码包的详细信息(作为 apt 命令的封装)
 versions        显示指定软件包的版本信息。
 clean           清除已下载的软件包文件。
 autoclean       删除旧的已下载软件包文件。
 changelog       查看一个软件包的变更日志。
 download     - 下载软件包的 .deb 文件。(作为 apt 命令的封装)
 source          下载源代码包(作为 apt 命令的封装)。
 reinstall       重新安装一个当前已安装的软件包。
 why             解释为什么某个特定的软件包应当被安装。
 why-not         解释为什么某个特定的软件包不能被安装。

 add-user-tag    将用户标签添加到软件包/模式。
 remove-user-tag 从软件包/模式删除用户标签。

选项:
 -h              此帮助文本。
 --no-gui        即使可用,也不使用 GTK 图形用户界面。
 -s              模拟动作,但是并不真正执行。
 -d              仅仅下载软件包,不安装或者卸载任何东西。
 -P              总是提示确认执行动作。
 -y              假设对简单的 yes/no 问题回答“yes”。
 -F 格式         指定显示搜索结果的格式;详见手册。
 -O order        Specify how search results should be sorted; see the manual.
 -w width        Specify the display width for formatting search results.
 -f              积极地尝试修复损坏的软件包。
 -V              显示要安装的软件包的版本。
 -D              显示自动改变的软件包的依赖关系。
 -Z               -Z              显示每个软件包的安装尺寸的变化。
 -v              显示额外信息。(可能被重复提供多次)
 -t [release]    Set the release from which packages should be installed.
 -q              在命令行模式下,不显示增量进度指示器。
 -o key=val      Directly set the configuration option named 'key'.
 --with(out)-recommends     Specify whether or not to treat recommends as
                            strong dependencies.
 -S fname        Read the aptitude extended status info from fname.
 -u              启动时下载新软件包列表。
                  (只有终端界面)
 -i              在启动时执行一个安装操作。
                  (只有终端界面)

请查阅手册页以了解完整的选项列表及其描述。

这个 aptitude 没有超级牛力。